I guess it’s time for a totally derivative episode.
Today, on filler episodes, it’s upgrading from vSphere 6.5 to vSphere 6.7.
Woo.
Background
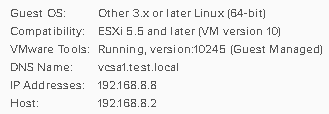
This was done in my lab. I needed to upgrade it. The PSC has already been done, so this will show VCSA1 being updated.
Load the UI interface from the vCentre 7 ISO

Click on Upgrade
So you may not be aware (I mean it’s not like there’s more important things going on) but VMware are currently moving most of the products away from the underlying Linux base to a Photon base. This has a number of advantages, but one of the most visual (apart from the natty Photon boot screen) is that upgrades now consist of deploying a new appliance, migrating data from the old to the new, and then shutting down the new. This is annoying for poor people like me who have limited resources, but, it does mean I have a complete fall-back: just boot the old appliance;

Anyway, onwards.

Ta-da, it’s a wizard, you know the deal: next, next, next, finish….
I’m not going to screenshot every screen, because:
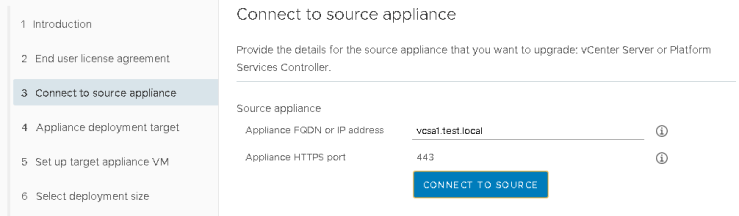
Click Connect to Source to move forward. Ha, no Next box…
Next you need to provide some additional info.
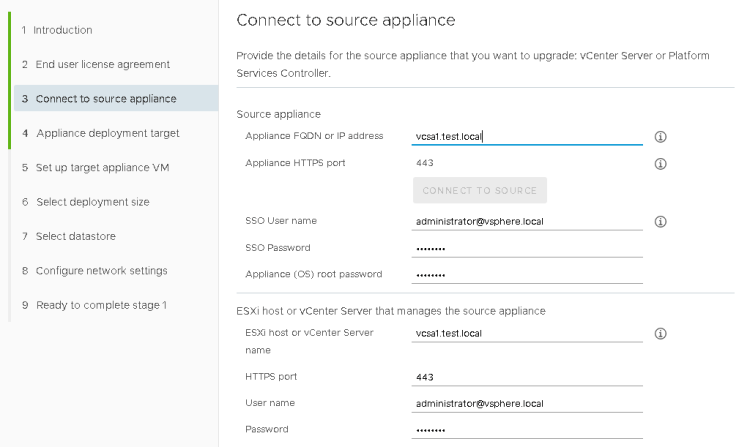
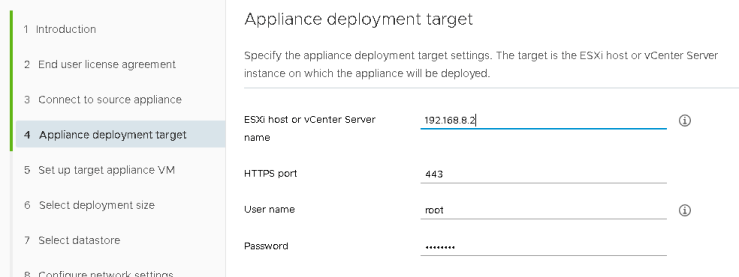
Note: Here I’ve used an IP address for my ESXi host. This is partly because of my lab setup, and partly because I find vCentre deployments (and this is basically a deployment and file copy) work better when I point directly to the host I want to deploy to.
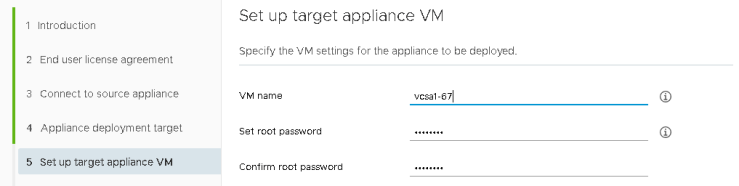
Give the VM a unique name. I’m a fan of self-documenting things.
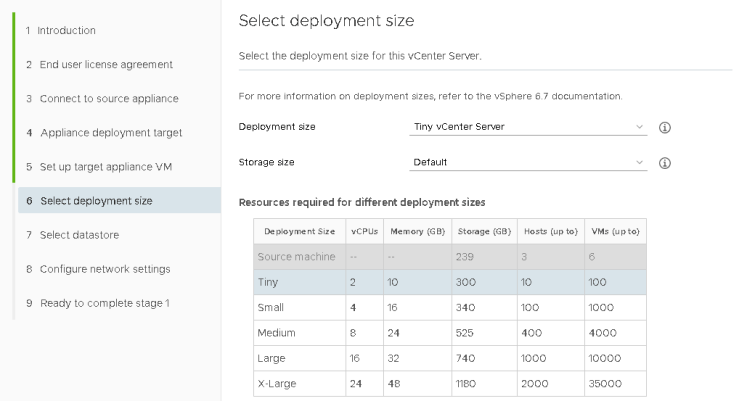
Pick a size
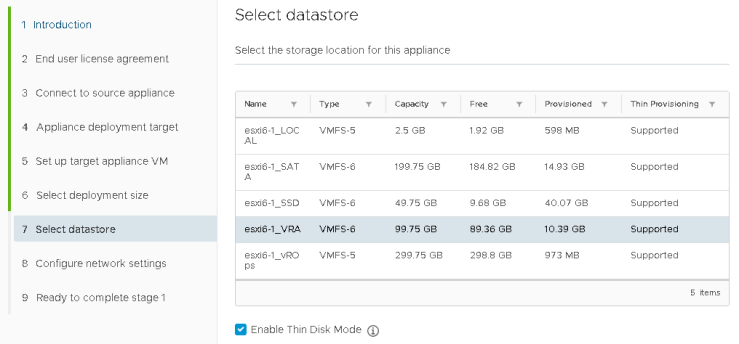
Select a datastore
I’m sticking it on a datastore called _vRA because it’s got space, and once everything’s working I’ll move it to a SSD
Give it temporary IP settings
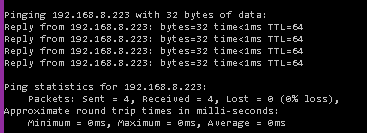
A few things here, the temporary IP address must be free. It doesn’t need a DNS entry.

The IP address is used during the upgrade but is released after the upgrade is complete. When doing my PSC I used .222:

And with no reboots or anything on my end, it’s nice and free.
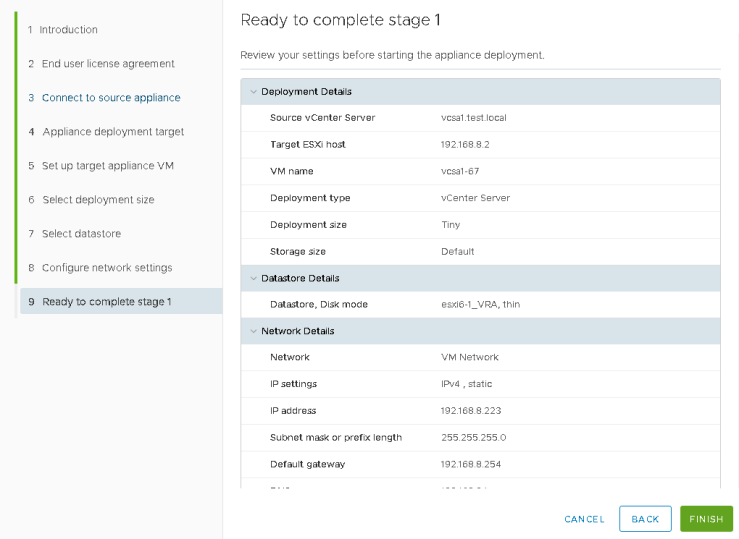
And finally, Finish
And it so it begins


Around this point, it boots the new VM

Waits for a long time and then deploys the settings configured during the wizard

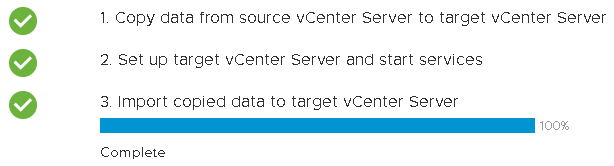
Stops and starts various services and then the new appliance is online

Stage 1 complete.

Stage 2 begins

Gah. Why is nothing ever easy.

Seems ok
Reboot and it worked.

Oooh, more problems…
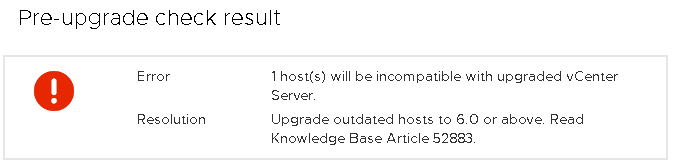


Remove the 5.5 host I had lying around, and onwards dear fellow, onwards.
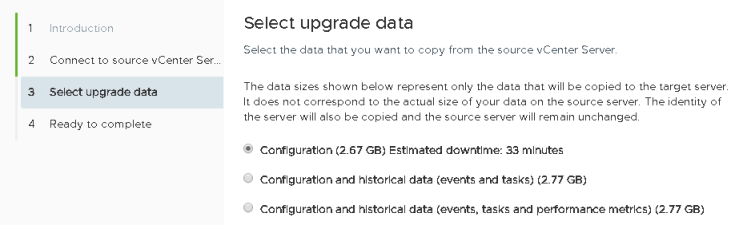
I only want my lab configuration.
And go go go


I know it’s a lab, but this isn’t quick

At some point it’s swapped my VC’s over

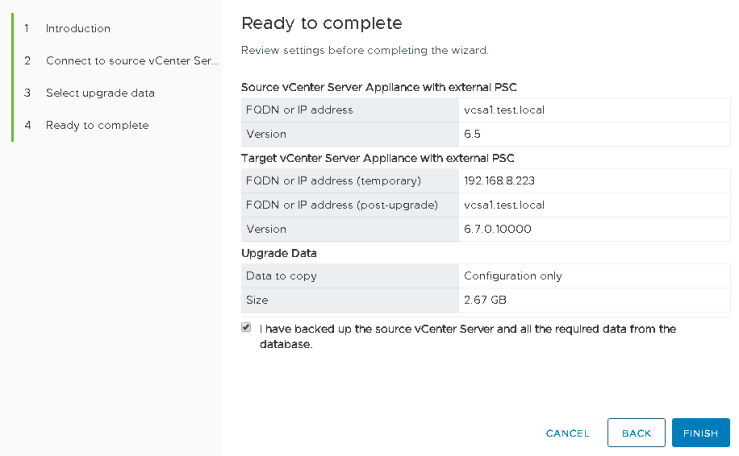
And finally
The PSC was roughly the same process. Took about 90 minutes for both the PSC and VC.
